|
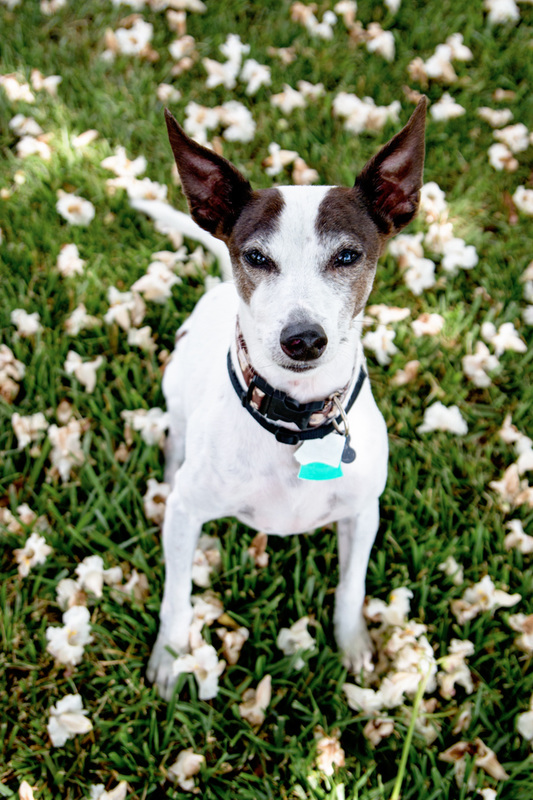
Catchlights are the theme for this week's Project 52 and they are very important in images with people or animals. Very simply put, if you don't have catchlights in the eyes, there is not much life to the image. In this first picture of Dash the reflection of the snow covers the bottom half of his eyes, but as far as catchlights go, there is only a tiny bit at the top of his eyes. 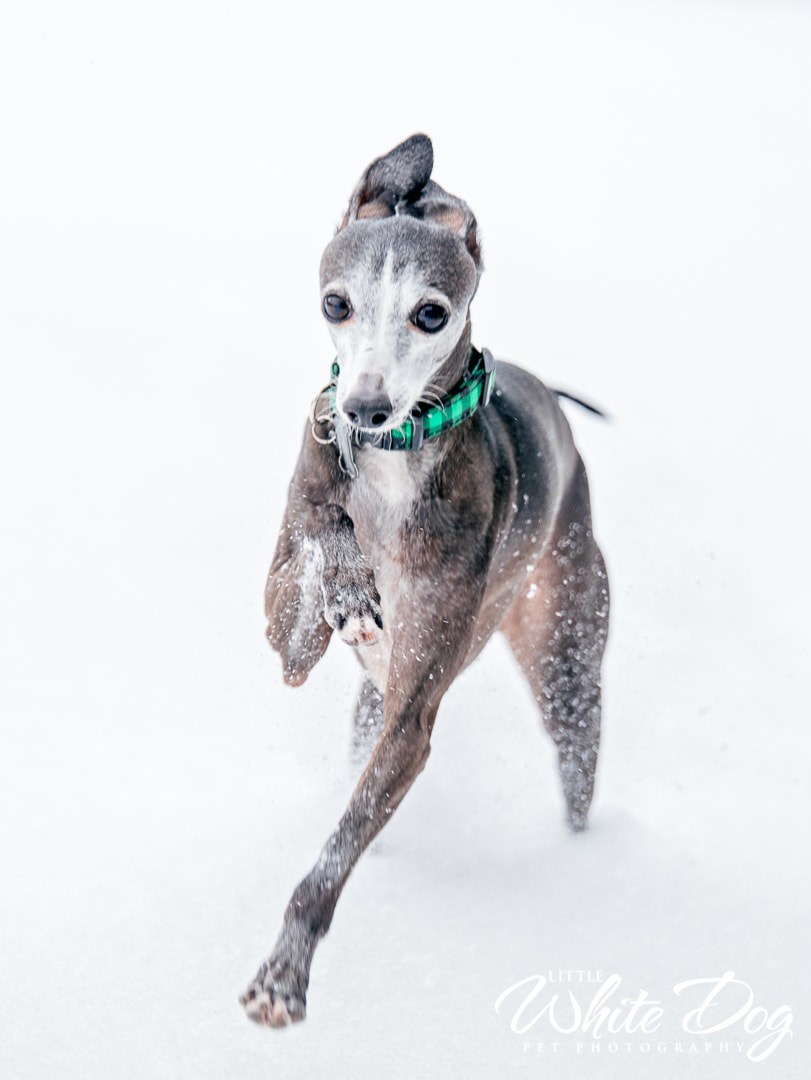 Once he came inside, the windows cast nice catchlights making his eyes have more life to them. 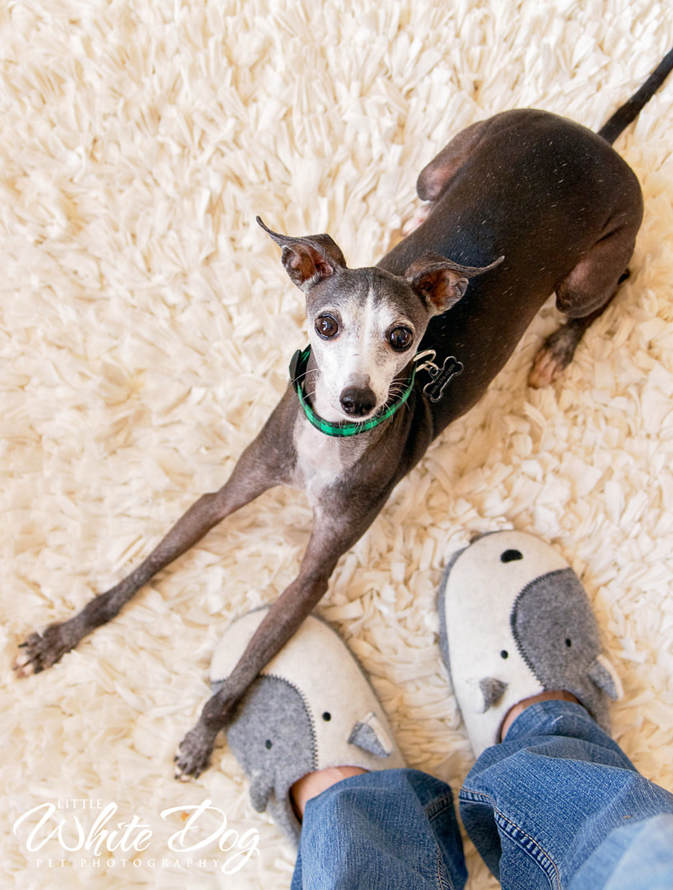 If you saw my previous post this week celebrating Ollie, then this next image will look a little familiar. With lots of fur and being black to boot, catchlights are sometimes the only thing that will save an image from looking like the dog has no eyes at all. In some images, the catchlights might be the only thing you see unless you print the image quite large.  When you are taking pictures of people or animals with your camera or your phone, make sure that you can see catchlights in their eyes. If you can't, then turn them until you can. Anywhere there is light... windows, open sky, light coming from another room, for example. It will make a huge difference in your image. If you'd like to see more of our catchlights theme, start with John Bouma with MaxNorman Pet Photography, serving the South Florida area and follow the Project 52 links around the blog circle. I hope you have a wonderful weekend!
26 Comments
There are rules to follow in photography just like every other craft, and the rule of thirds is one of the basics that every new photographer learns. It has to do with the composition of an image and can help draw the viewers eye to what the photographer wants them to see. The image is divided into three equal section both vertically and horizontally. The "rule" is that when placing your subject in the frame, placing them on the intersection points of these division lines has the most impact with the lines themselves coming in second. This does help new photographers to see the impact of the rule of thirds on an image, but ..... rules are made to be broken. Lets just say, if every image followed the rule of thirds, things could get boring very quickly. For me, the rule of thirds is not something I think about when I aim my camera. However, there are certain scenarios that I find work beautifully for this composition technique; landscape images with a person in them for instance. If the person is in the middle of the image then the image is about that person using a "look at me" frame of mind. If the person is placed using the rule of thirds, then that person now becomes part of a "story" rather than being the main character. You see the person and then you see where they are or what might be going on around them. 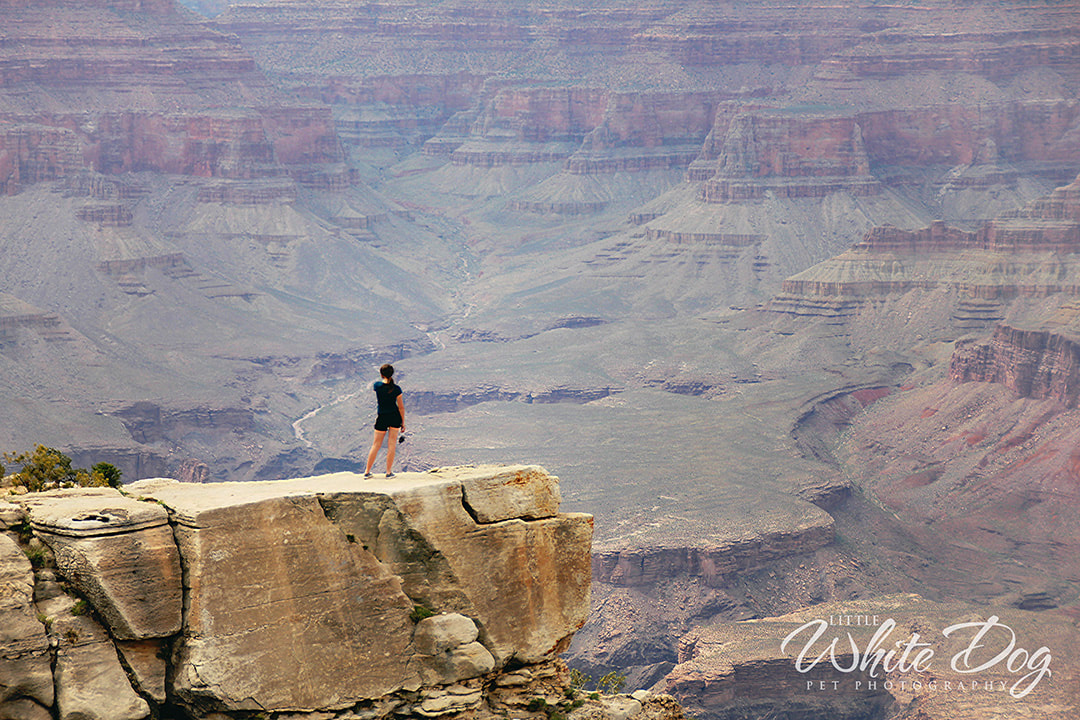 The rule of thirds also works nicely if the scene is quite simple. Placing the subject using the rule of thirds can be very pleasing and actually relaxing to the viewer. (Here's Hermes helping me demonstrate "relaxing.") 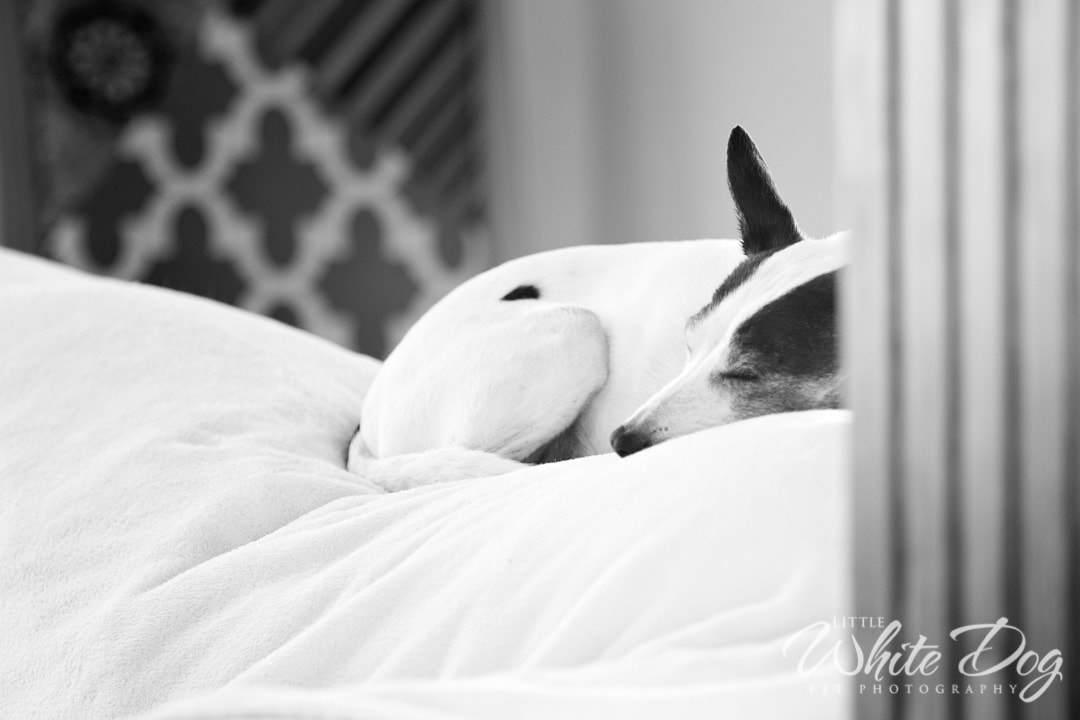 Then there are times when you want to emphasize something in your image without making it seem quite as intrusive (or caloric). Using the rule of thirds can make something seem a little less "over the top" than if you put it right smack in the middle of the scene... Ok, this one might be a little over the top anyway, but you get the idea. ;O) 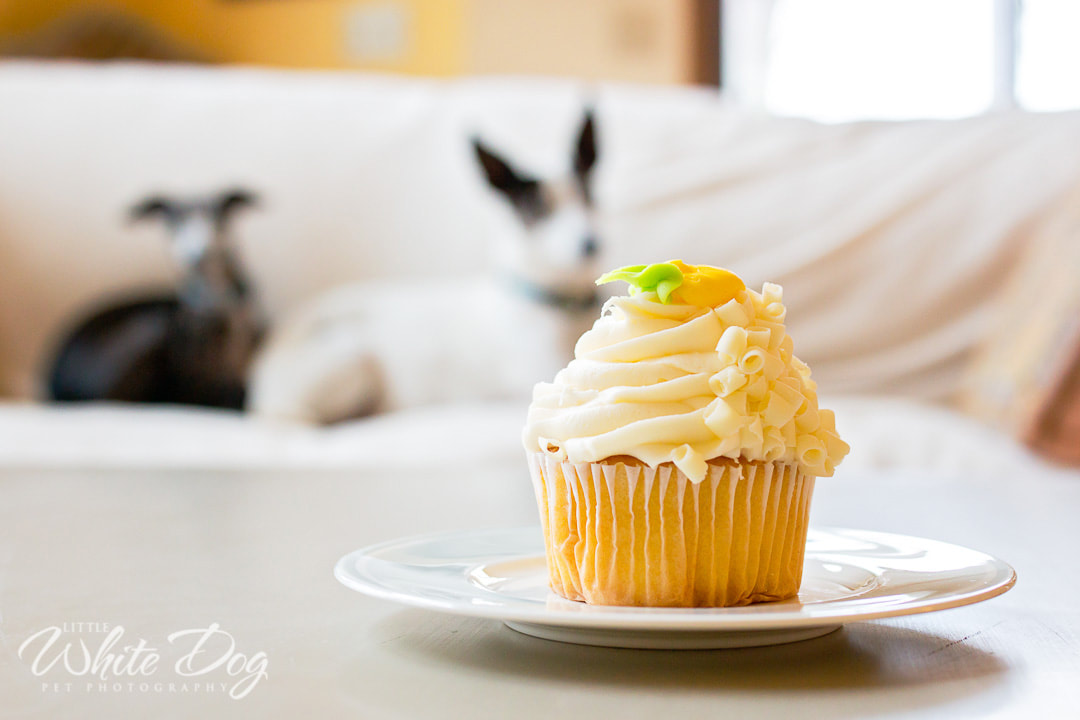 Want to see more about this week's theme? Head over to St. Cloud, Twin Cities and central MN About A Dog Photography to continue the blog circle and have a great weekend! (I think I need a little snack.)
It's January - a new year, a new beginning and I'm participating in a brand new Project 52. This project is a round robin of sorts that will take place once a week, and there are pet photographers from around the world who will be taking part throughout the year. At the end of each of our Project 52 blog posts will be a link to another participating photographer's blog so that you can click through and see how they interpreted the theme as well. Blank Slate The theme this week is Blank Slate and there are so many ways to interpret this prompt: Dash considers it a blank slate every time he sees a squirrel (and it's usually the same squirrel, too). The score is even between them and this time he just might win. Dash, you will always win for being the loudest, but that squirrel will always be able to climb the highest. If it makes you feel any better, I could get you a blue ribbon for "most voicetrous." Opposite Dash, is Hermes who never seems to start with a blank slate. He remembers everything (and I'm pretty sure he keeps score)... Treats are behind that door... Wednesdays mean doggie playdates (I swear he knows when it's Wednesday)... and, when the vacuum cleaner comes out that means someone's coming over and we might get treats to stop jumping on them! 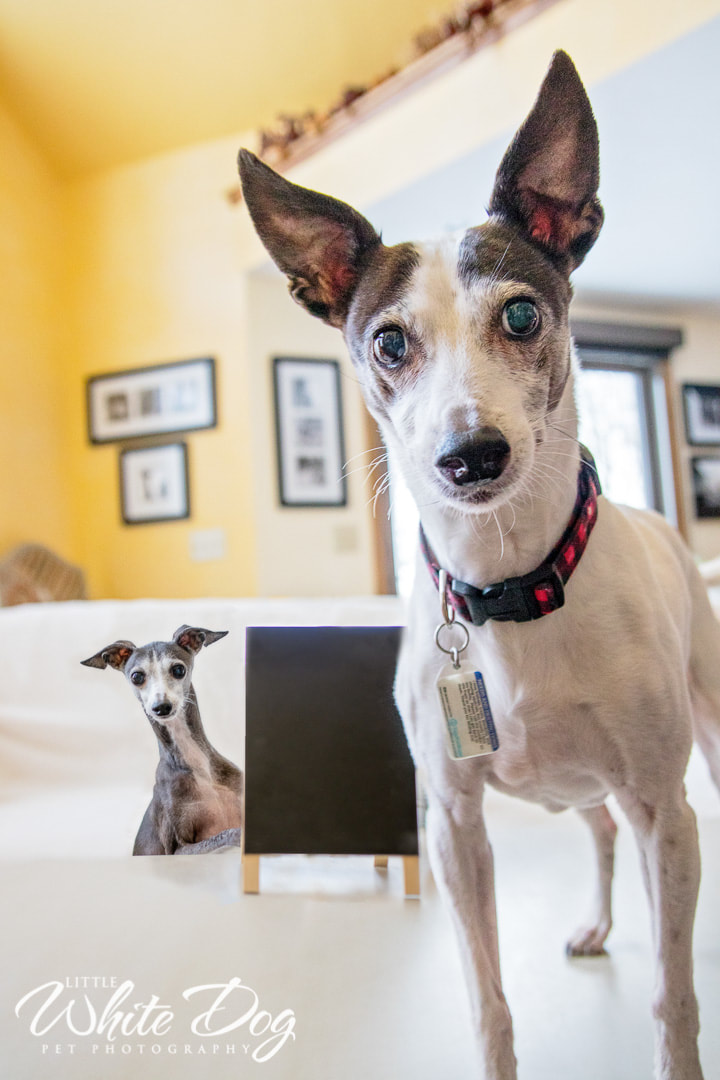 I explored all the ins and outs of blank slate (I might take these prompts a little too seriously), but it wasn't until I searched for quotes that I realized how perfectly this prompt fits my pet sessions. Life is just a blank slate, what matters most is what you write on it. - Christine Frankland "I am a blank slate - Therefore I can create anything I want." -Tobey Macquire Having a blank slate is sometimes as daunting as it is exciting. -Joe Madureira It was this last quote that made that cartoon light bulb go off over my head. Every session that I schedule starts with a blank slate. It's not something I intended to do because everything I read before starting my business said that photographers need to have a plan (or at least a list) in order for sessions to run smoothly. While this might be great for classic wedding or portrait photographers, I quickly discovered that this would not work for me and my photography objectives. With the exception of finding out what my client's goals are and learning as much as I can about their pet, my sessions are rarely ever planned (and this both scares and excites me). With a "blank slate" each session literally creates itself... with a little help from the pet of course. To see the words, wisdom, and works of other photographers in this project start with Elaine Tweedy of I Got The Shot Photography located in Northeastern PA.
Have a great weekend! It is my opinion that . . . Every pet owner needs to have a picture of themselves with their pet. If you have a pet session with me, just expect me to ask you if I can take a few shots with you in them as well. (You can say, no of course and that's fine, but I feel so strongly about it, that I have to ask.) It's the candid shots that I love the most. The ones where the people don't realize I'm photographing them. The images are so beautiful because they are so real - No cheesy grins, no self-conscious smiles, just . . . real . . . genuine . . . heart (and that's not just the dogs I'm talking about). ;O) How many times have I heard someone say, I wish I had a picture with my dog before she passed away, or I wish I had a picture of my dog and I before he got sick. It happens all the time because time really does fly. If you are planning to have pictures taken and you plan to have your pet be a part of them, fantastic! If you don't have plans for a professional session then when you're snuggling with your pet on the couch and watching tv have a family member snap a picture of the two of you. Or, the next time you go out to play fetch ask a friend to take your picture in the yard. If you go to an event like, oh lets say a dog swim. . . document it! You'll be so glad you did. ;O) 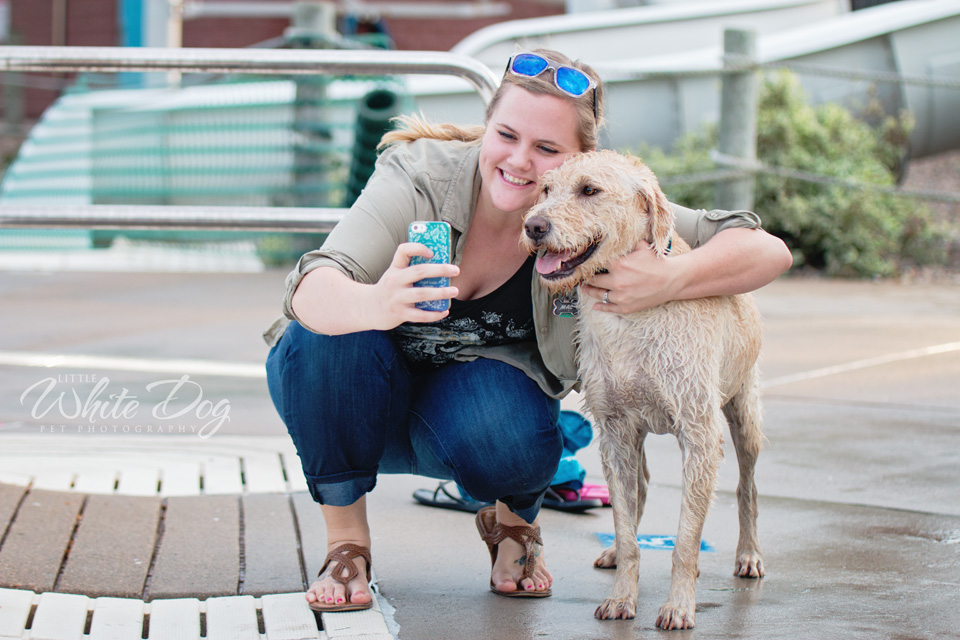 Project 52 is a blog circle so head over to Charlotte NC based dog photographer Kim with BARKography. You can click from one blog to the next until you end up right back here.
I hope you have a wonderful weekend! Take a picture or a "me and my pet selfie!" (And then don't forget to print it out or back it up somewhere until you can.) ;O) It use to be that photographers would cast away images for lens flare as fast as they would for blur. Now days they aren't so fast to trash those photos, and some portfolios are full of these images because it's the photographer's artistic style to include the flare. Lens flare occurs when light hits the front element of the lens, "bouncing" around inside the lens creating circles, rainbows and bursts within the image. This is more common when using entry level lenses as the more expensive professional lenses have better optics to help prevent lens flare. So, for the photographer or artist, they just need to decide whether they want to include flare in an image or prevent it, and then adjust to achieve their goal. This first images was taken at the Renaissance Festival. I did not plan the lens flare on this photo, but there was no way I was throwing it out with the fun that was added to the image because of it. 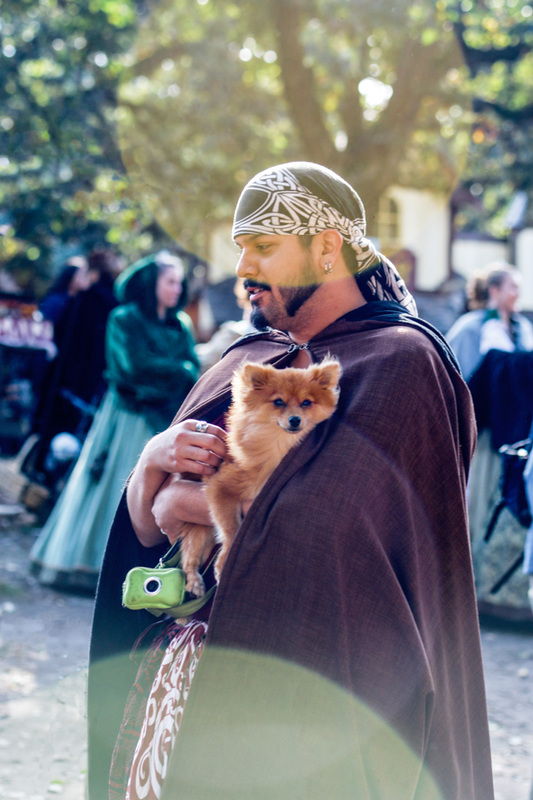 With this next image, I worked hard for the flare. I bet I took 20 images before I got that flare the size, intensity, and in the exact spot that I wanted. 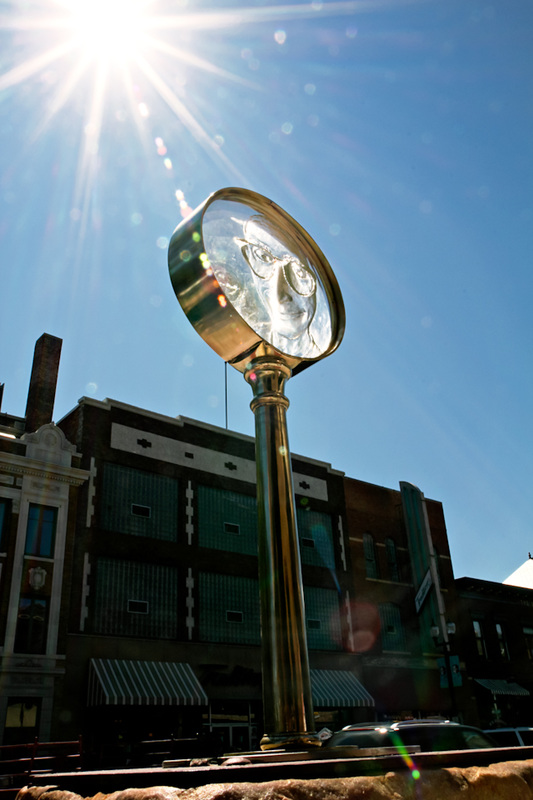 This one is more subtle with a smaller burst. 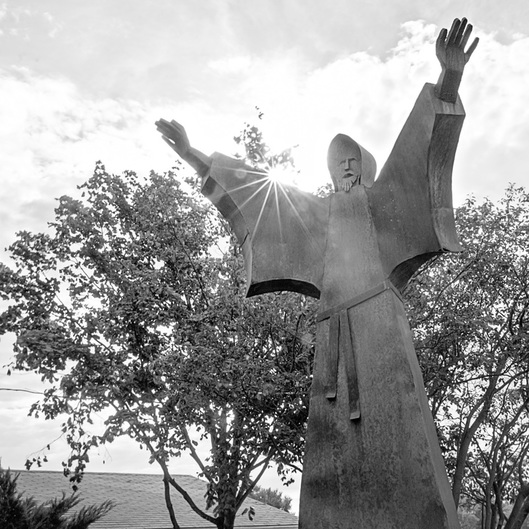 This final image has a very subtle flare in the background, but it adds a haze to the image that lets the viewer feel the warmth (but not the humidity thank goodness) of the summer evenings that we've been having. 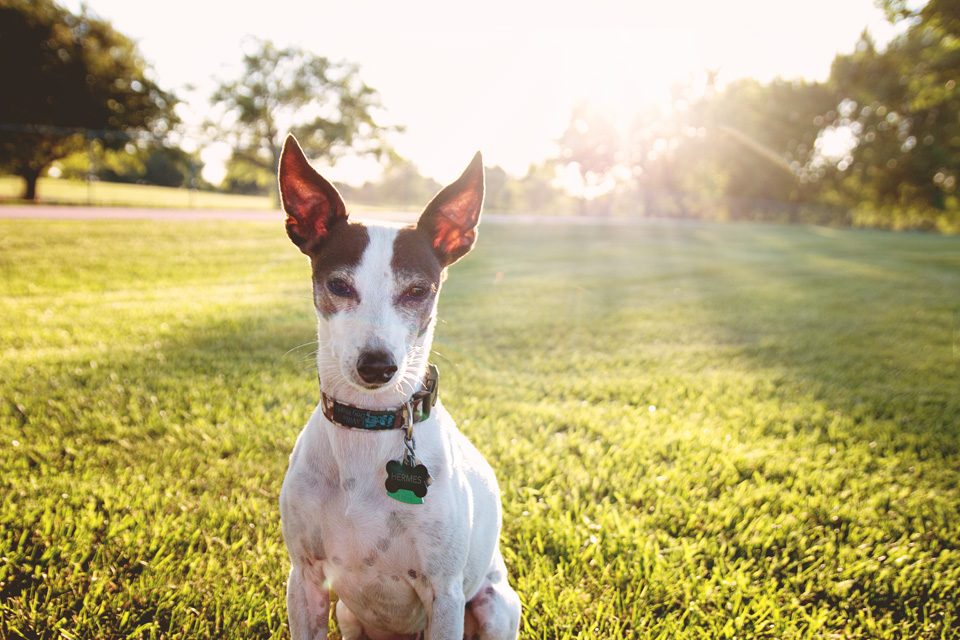 Yep, it's been a hot one here in Sioux Falls, but the next couple of days are suppose to be nicer. I hope you are able to get out with your family and pets and enjoy it. If you'd like to follow the blog circle for this project, this week you can start with Elaine at I Got The Shot Photography, Northeastern PA.
I have been waiting for this post topic to come up in our Project 52 challenges for weeks now. I love shadows and I've always been one to notice them before anything else. I will take pictures because of the shadows that I see, and I will take pictures of just shadows alone. They are their own art, and they are just waiting for someone to notice them. I don't think I've ever taken a picture with shadows where it was planned ahead of time. It's always been one of those fun surprises. For this post I needed to get some shadow images, but nothing turned out as I envisioned. When I quit trying, that's when I finally got something so, we'll start there. . . a new (blurry, ack) action shot with the cutest shadow ever!  I could not NOT take this picture of me and Zoe ( Zoe and I? ) when I noticed our shadows. Zoe was our boarder collie who passed away. I'm so glad I have this picture even if her shadow does look like a tiny brontosaurus. It just make me happy when I look at it. ;O) 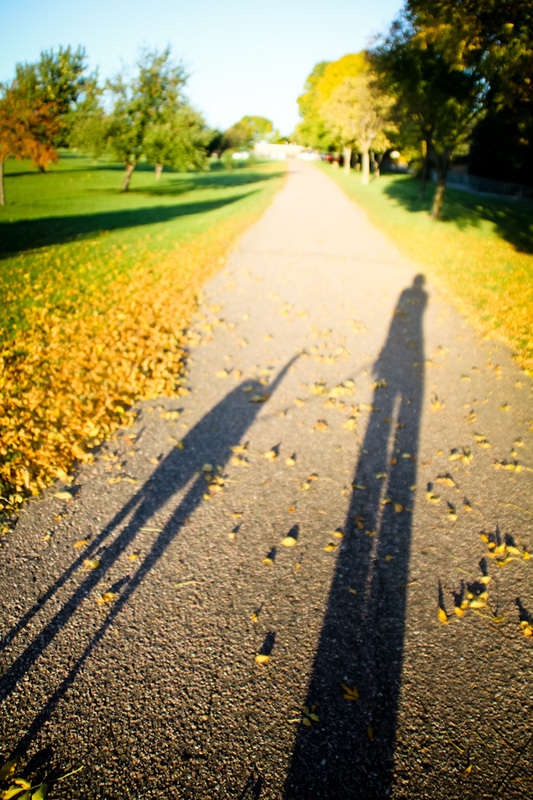 Then there are these two images. Hermes was only about 10 weeks old here. I did not position him or plan the shadow, but I did notice it. I just kept shooting and wound up with some winners. 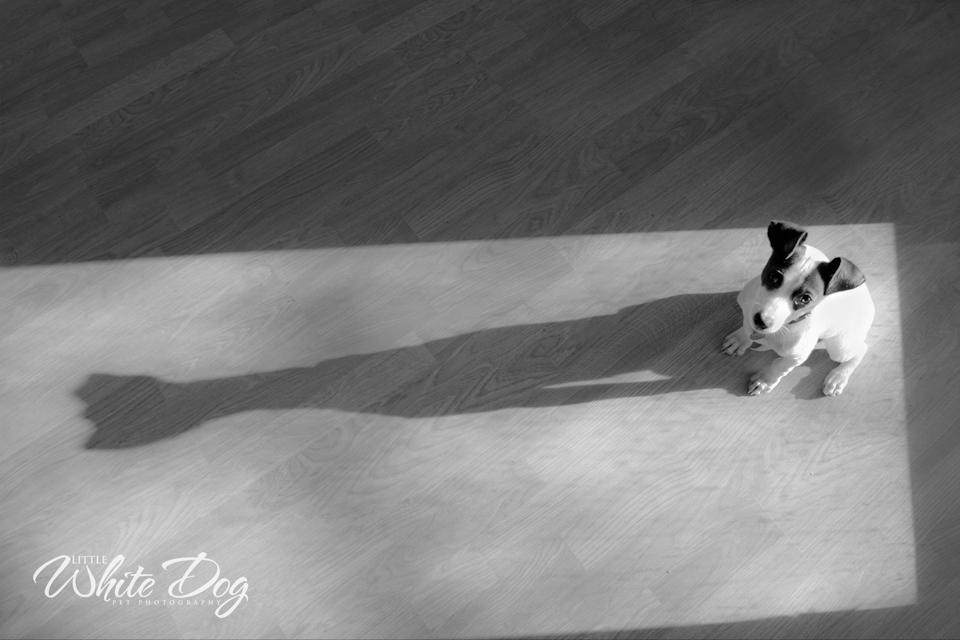 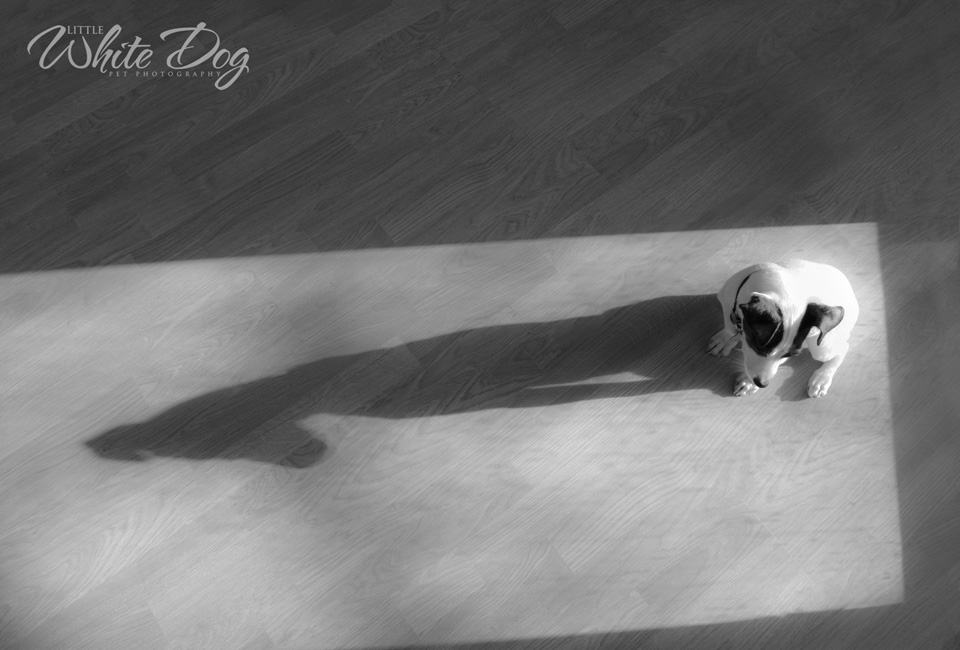 To see what other photographers in the group came up with for this weeks Project 52 post, start with About A Dog Photography, St. Cloud Minnesota. Have a great weekend!
First of all I need to apologize for the empty post last week. I got so busy with sessions and editing that it never wrote itself. (It's hard to find good help these days.) ;O) The next few weeks still fall under the "lighting" category, but they are, more specifically results or effects of certain lighting situations. The topics are all things that we don't always notice as we go about our daily lives, but are almost always there. This week's topic: Reflections There are a number of ways that you can incorporate reflections into your photography. Mirrors are the most obvious source of reflection, but it's how you photograph them that makes things interesting. Think about wedding pictures you've seen of the bride's reflection in a long mirror. You get to see the bride and the front of her dress in the mirror, but you also get to see the back of her dress at the same time. Here is an image from a recent session showing another way I like to use mirrors. She's not a bride, but she's just as beautiful. ;O) 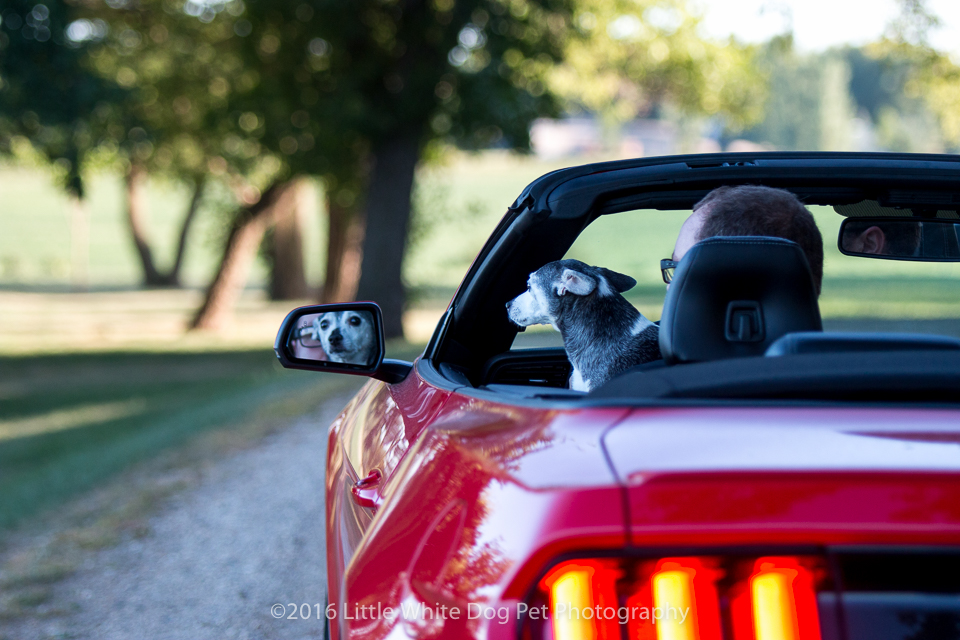 Water is another thing that comes to mind when we think about reflections. Hermes has an aversion to water, but I did manage to get this image before he pulled us away from the area. 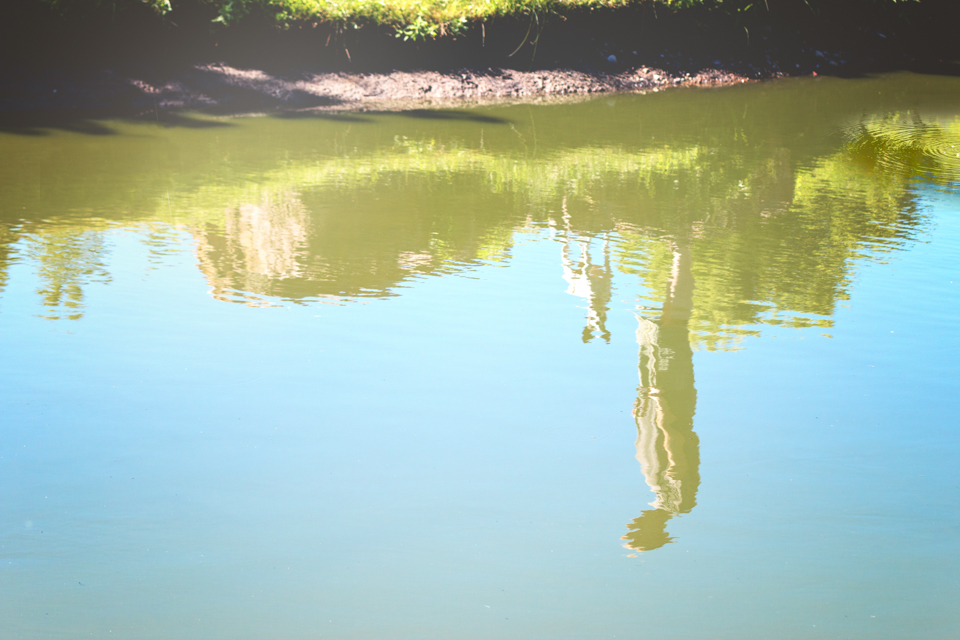 With reflections, it's often times simply the symmetry created by them that makes an image fun. However, there are also contrasts that sometimes emerge as well. This image ended up looking like a color image vs black and white-(ish). It also has a double personality kind of vibe . . . tatoos and piercings vs enjoying the scenery from a little outdoor bistro. ;O) 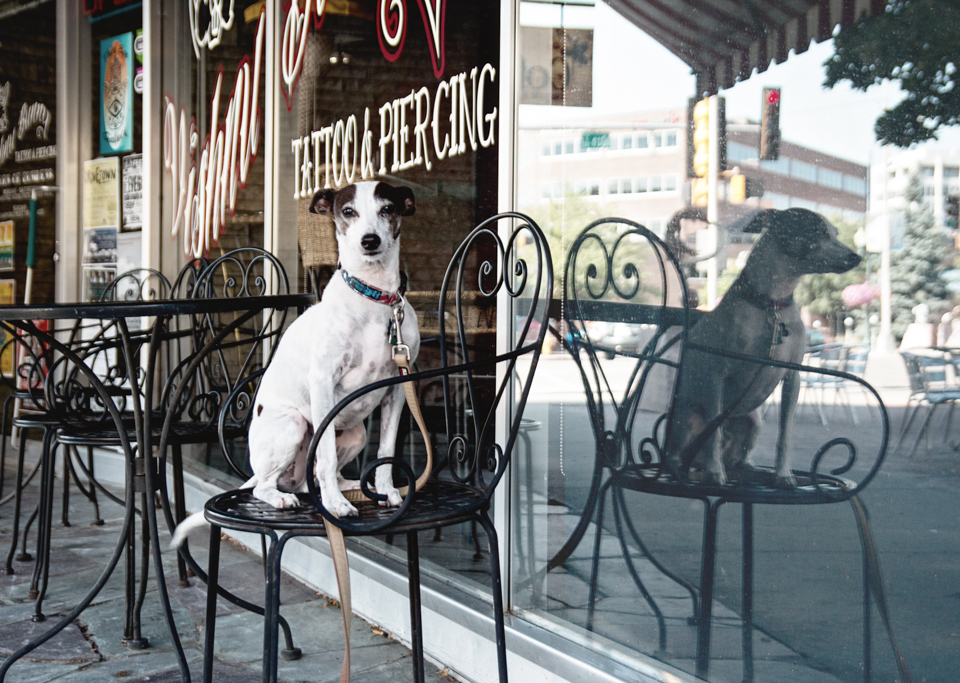 When photographing your subject in front of a window you can always use it as a mirror but, you can also capture multiple sides of "the story." I took this picture for a self portrait challenge a few years ago. I actually had no idea that Zoe was in the house looking at me when I took it. (Or, who knows, maybe I knew it, but didn't think twice about her showing up in the image.) The goal was to get a self portrait, but I ended up with an image that showed my reflection, all that was behind me, and the inside of the house as well. What would you call that? It's not 3D and it's not a 360, but there are definitely 3 layers to this image. Again, guess which pet photographer thinks to look for opportunities like this now. ;O)  Since this is a round robin type blog project, you can see reflection images from others in this group, starting with Rachel at Hoof N Paw Fine Art & Photography in Spokane, WA.You can click from one blog post to the next ending up right back here.
I hope you have a great weekend! The Blue Angels will be performing in town at the 70th Annual Power on the Prairie Air Show. Hope some of you can make it out. No matter what you do though, please be aware of the heat and take precautions with yourselves and your pets. Hi guys! I hope you all had a wonderful 4th of July. Those who have dogs who shudder during fireworks . . . congratulation, you made it through another year! It's freestyle week for Project 52 and this time the theme is, "sky." Sooooo many options here. Including sky in your images can do any number of things for them. 1. Sky in an image can add color: Blue skies of the day, golden skies near dusk, and don't forget sunsets. 2. Skies can help set the tone or mood of an image: Blue skies with billowy clouds make me think cheerful, happy, carefree. Darker skies can provide great contrast in an image, and work great for bold or very masculine images. 3. Shooting from a perspective that includes the sky can declutter a background or even make your subject look bigger or taller than they actually are. Keeping it short and sweet this week, I chose to just have a little fun. Here's Hermes in super hero mode. ;O)  If you'd like to take a spin around the blog circle, start with St. Cloud MN dog photographer About A Dog Photography. I hope you enjoy your weekend!
This week our Project 52 subject is back light. This is a tricky lighting situation for traditional photographs because your subject is usually hidden in shadows. If you want details like a person's correct hair or eye color then back light is not going to make things easy on you. If however, you are looking for more drama in your images, more emotion so to speak, then you should give it a try. You might surprise yourself. When an outdoor scene is back-lit, the first thing you might notice is that there is a big contrast in light and shadow. The light coming through the leaves of a tree or plant are highlighted and this makes the shaded areas even more dramatic. Your subject will a lot of times be almost completely silhouetted. 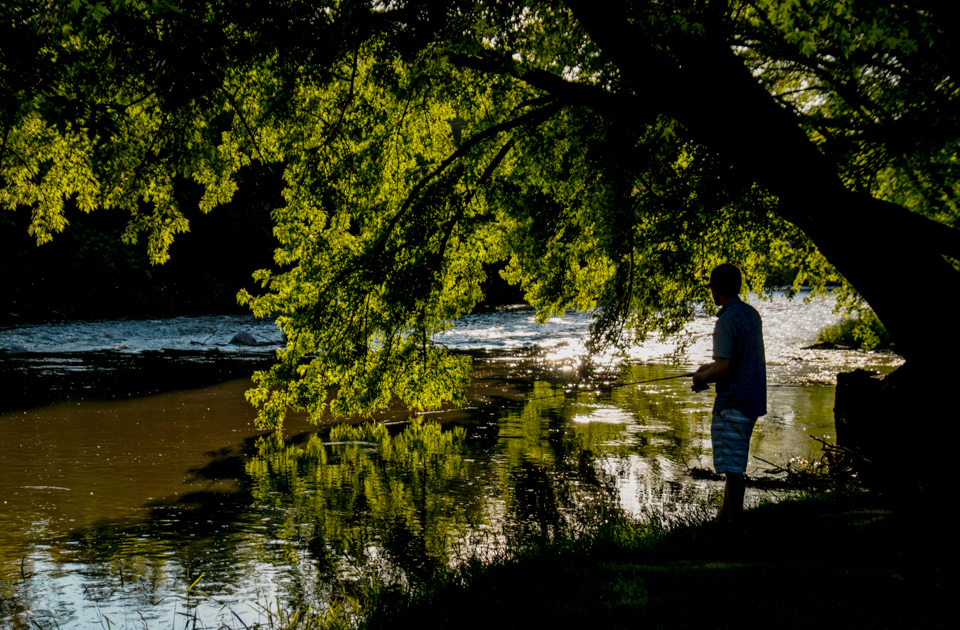 In an open scene when the sun is low in the sky, a back-lit photograph often times has a glow around the subject, we call this rim light. Rim light naturally outlines your subject giving more depth to the scene. In the first image, even though it was taken while the sun was still fairly high, you can easily see the rim light on Hermes' face and tail. (You can even see his goatee whiskers.) While light from the front bounces off your subject/scene, back light often shines through. Not only is the light shining through the leaves in this image, but it is also shining through Hermes' ears; if it weren't they would be as dark as his eyes being mostly hidden in shadow. 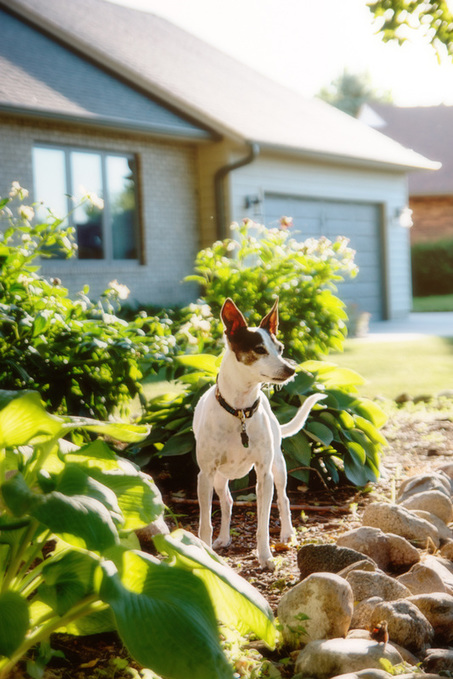 In this next image, the back lighting gives a more dramatic flair. The morning light is coming from behind the trees creating a path. You can still see that glow around Hermes, and again the light shines through some of the leaves, the grass, and through his ears. 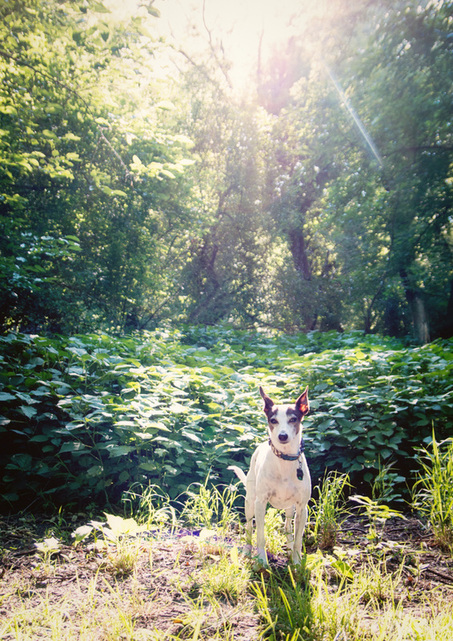 This last image was taken later in the evening and everything fun about back lit images is present. (The stuff that I think is fun anyway) Hermes has wonderful rim light on his entire body, you can see little floating bits in the air that you can't see without back light, and the cherry on top was that I was able to get a slight sun flare through the trees. 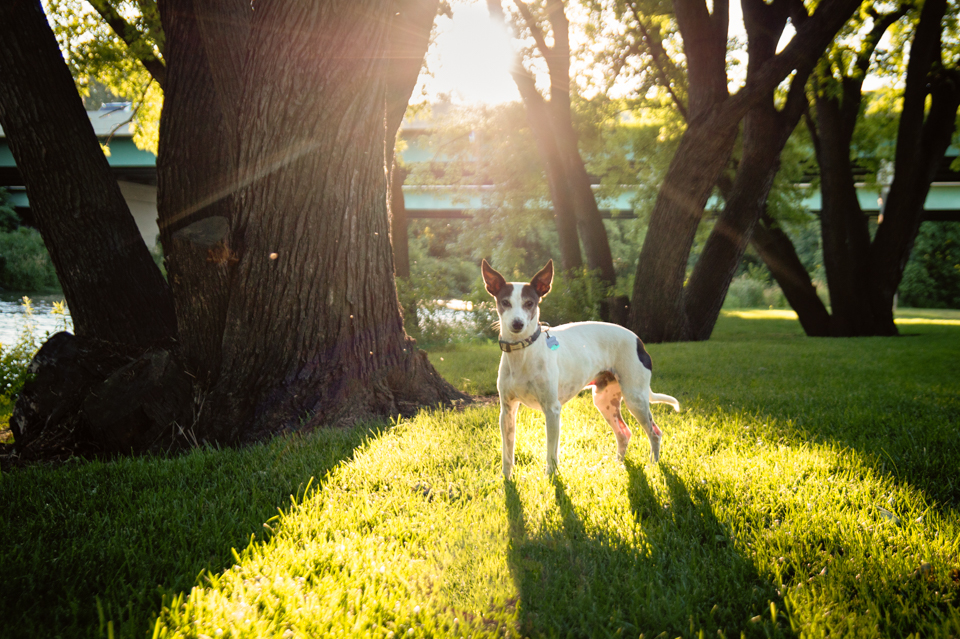 There is much more that can be accomplished with back lighting than the few things that I've pointed out here. Some photographer portfolios are filled solely with artful images created in this way to suit their own particular style of photography. If you google "children's photography images" I bet you'll be able to instantly pick out the ones that were back lit. :O) For those who are wondering what these Project 52 posts are all about . . . A group of pet photographers from around the globe are working from a book by David Duchemin called, The Visual Tool Box - 60 Lessons For Stronger Photographs. Those who don't mind sharing their "homework" are creating blog posts about some of the topics (chapters in the book). We create a blog circle or round robin of sorts so that you can see how each photographer who participates that week interpreted the chapter in their own work. This week you can begin the circle with Susannah at Pet Love Photography, serving Greater Cincinnati and the San Franisco Bay Area.
I missed out on a couple of Project 52 posts being on vacation, but I'm back just in time for the topic of light. Those of you who enjoy photographing landscape or flower images might find this week's post helpful. How many times do we come back from vacation, upload our images and find that they do not do the scene justice. We took that photograph because it was a gorgeous view, but what we see on our screen is not even close to what we remember. It's all about the direction of the light. When we photograph a scene with the sun behind us, lighting the scene from the front, everything is evenly lit. It makes it easy enough to get the settings right because there is not a lot of contrast of light and shadow. The only thing is, when we look at that image it's kind of dull, maybe even flat looking, and because of the even lighting the image has very little depth to it. If we are able to move around the subject (or come back at a different time of day for landscape scenes) so that the sun is coming in from the side rather than the front, everything changes for the resulting image. The shadows that occur when something is lit from the side add texture, depth and even color to our images. In order to see the same details and texture in our images that we see with our eyes, we need to capture shadows along with the light. In these two images of Hermes the first one is lit from the front and the second is side lit. In the second there is greater depth to the grass as well as more detail in his face. This is a result of the shadows that are cast from the side.
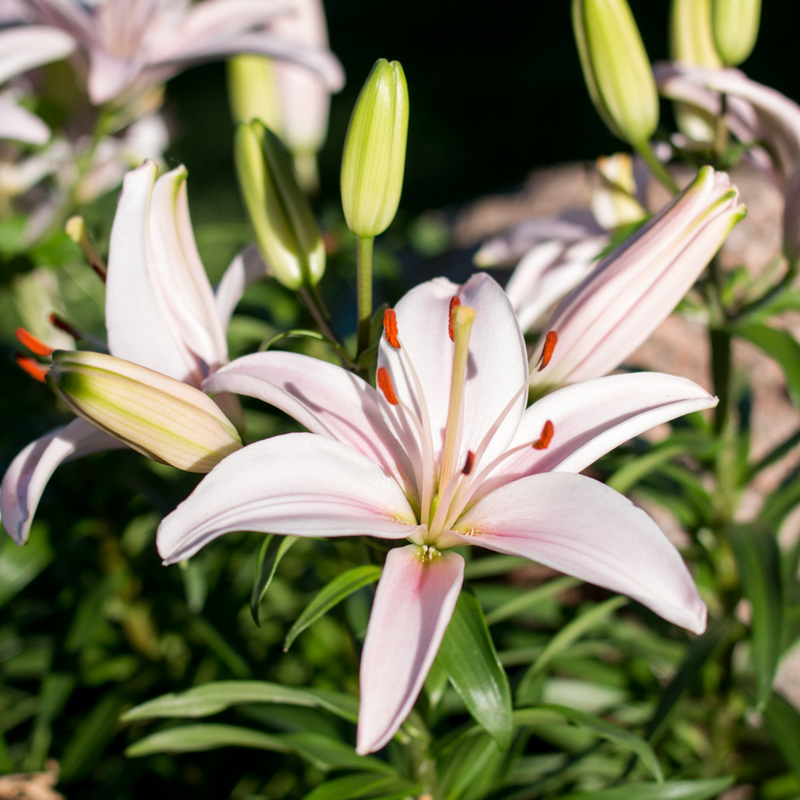
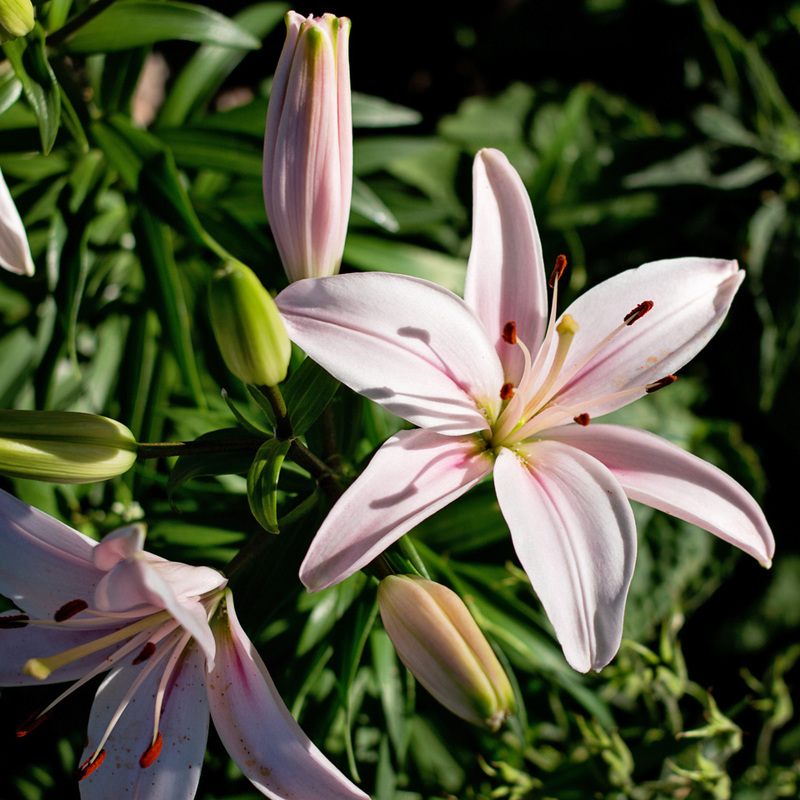
In these next two, the color difference is very obvious, and there is a lot of depth to the second vs the first image. 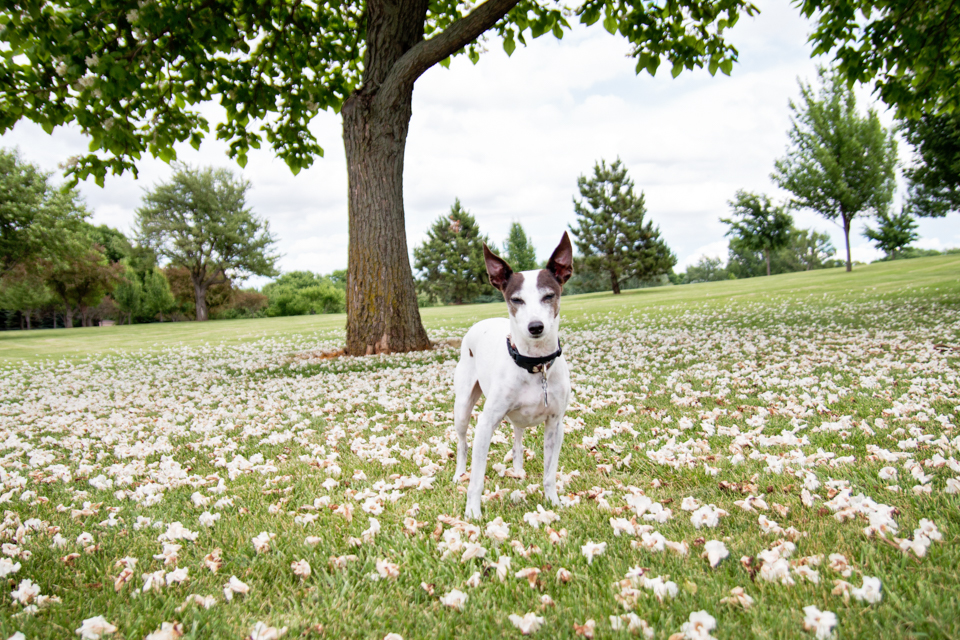 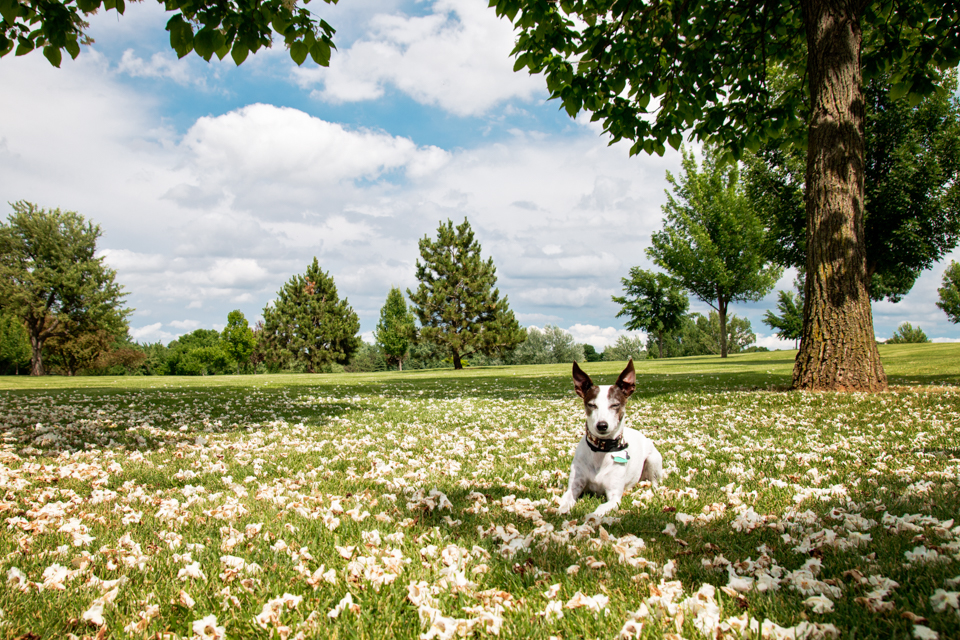 The shadows in the second image play a big part not only in giving Hermes more character (if that's even possible), but they serve as an element here as well helping to "frame" Hermes on an otherwise solid/blossom covered ground. Remember that whole "leading the eye" thing a few weeks ago? ;O) Here is one more example, this time using a lily. Side lighting gives more texture and details to the petals, both the open and closed ones. See what the shadowing did to the sticky-outy things (stamen? ) in the middle of the flower? They are different colors, especially noticeable in that bottom corner one. We know they aren't really different colors, but it's a lot more interesting than the solid orange of the first image.
The next time you're on vacation, try shooting with the light coming in from the side. It will make a ton of difference in your images. :O) To keep going with this blog circle, head to Kim's blog at BARKography (formerly See Spot Run Photography) in Charlotte NC. I hope you all have a wonderful weekend! :O)
|
Quoted...I can't really get them to say "cheese," but I can almost always make them smile. -Kelly Categories
All
GIFT CERTIFICATES AVAILABLE
|
© 2014-2024 Little White Dog Pet Photography. All rights reserved.
Feel free to share images with your friends, but please do not crop or edit photos. (Some of the more sensitive pets feel it makes their tushie look big. )
Feel free to share images with your friends, but please do not crop or edit photos. (Some of the more sensitive pets feel it makes their tushie look big. )